Introduction
Social media is one of the most important ways to reach a larger audience for your business. Today Instagram is one of the best-known social media platforms. Instagram is all about visual content. History teaches us that visual content — like images and videos — stick around longer in your brain than just a line of text. This is one of the reasons why every company should have an Instagram account. It may even be the case that potential customers are recognizing your company because they have seen a post — on social media — before.
Anyway, now that you have an Instagram account you’re not done yet. You also need to get followers. One way to get new followers is to embed your feed on your website. In this blog, I will explain how to do so in 2020.
By the way, if you want to read more about home automation, I would like to refer you to my other site MoreHue.com hope to see you there soon.
Why 2020 specifically?
Why specifically in 2020? Has anything changed? The short answer: Yes, almost everything has changed.
The long answer: About a year ago, Instagram posted a blog ith the statement that the way to get your Instagram feed embedded in your own website is going to change. These adjustments were originally scheduled to be implemented on March 2, 2020. However, Instagram decided to postpone the implementation until June 29, 2020. Since the 29th of June has passed, it is no longer possible to place your feed on your website in the old fashioned way.
What now?
According to Facebook , you should now use the ‘Instagram Basic Display API’. For this you’ll need the following:
- A Facebook Developer account
- An Instagram account with media
- A website
After you have taken care of the matter above, we can start with implementing.
To place your feed on your website you will need an access token. Many people think that it is only possible to do so after you have put the application live within the Facebook Developers Portal (which is quite difficult since you then have to wait for approval from Facebook), but it can be done much simpler. You can also make use of a Facebook test application.
These are the steps we need to take to make this happen:
- Create a Facebook application
- Create a Facebook test app for your application
- Setup Instagram Basic Display
- Add an Instagram Test user
- Authenticate the test user
- Get an access token
- Use the token to fetch your feed
Create a Facebook application
Do you already have a Facebook application? Then you can skip this step and navigate to your application.
If you don’t have a Facebook application yet go to My applications within the Facebook developers dashboard. Here you can create an application by clicking on ‘Create new app’ and select ‘Manage Business Integrations’. Name your app — however you want — and navigate to it.
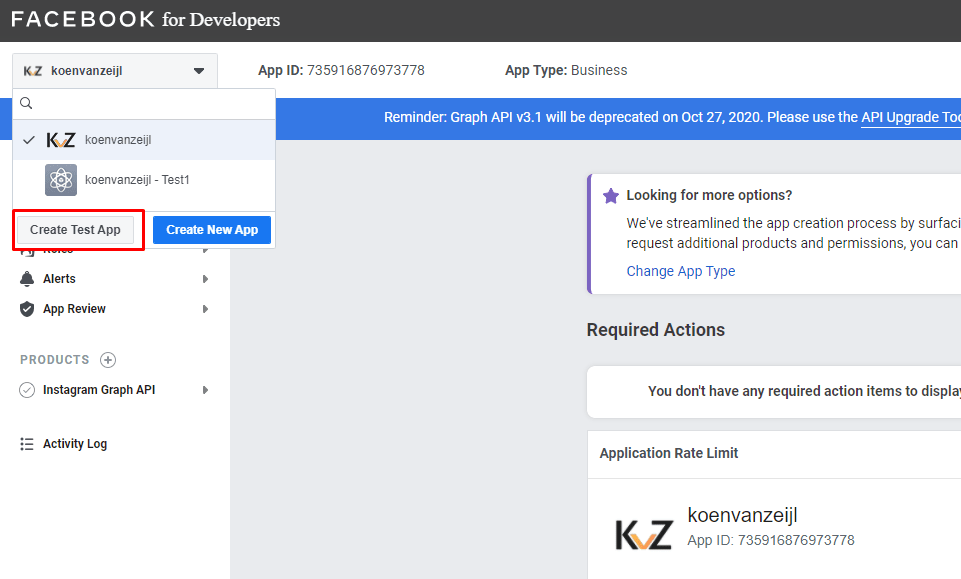
Create a Test app
Create a Facebook test app within your current application by clicking on ‘Create Test App’ and give a name to your test application.
Instagram Basic Display
Setting up the Instagram Basic Display is quite easy. You’ll see the products on the left. This list is currently empty. Press the plus sign and select ‘Instagram Basic Display’.
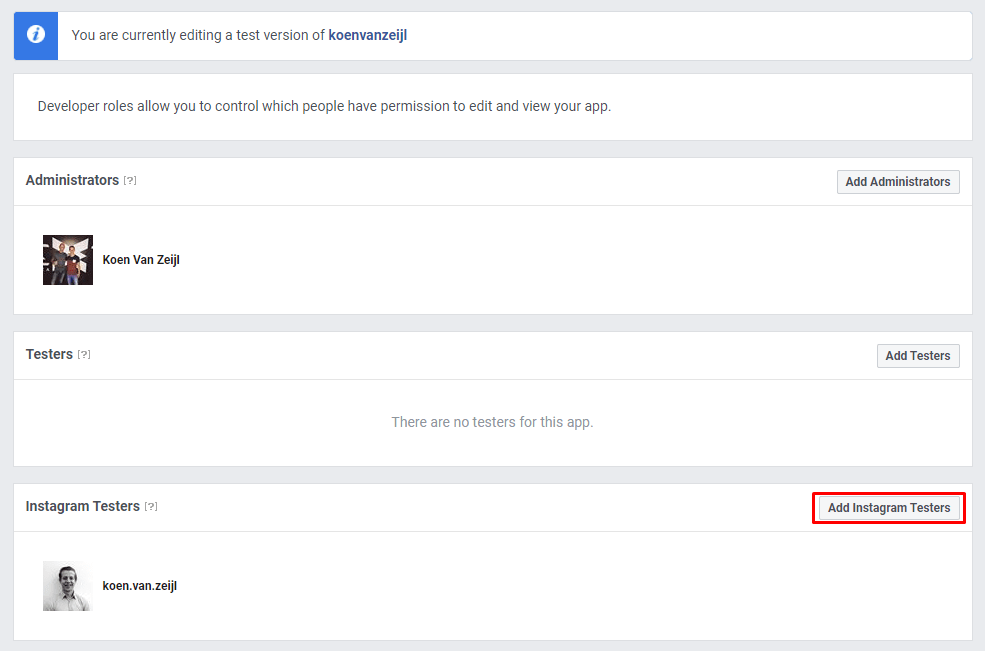
Instagram test user
Scroll down the Instagram Basic Display page until you reach ‘User Token Generator’. Here you have the option to add test users and generate tokens for them.
Then add a test user by clicking on ‘Add Instagram Testers’. Make sure to select the account from which you want to load the feed.
Then go to the Instagram page 'Apps en websites' and accept the invitation. From now on you can generate tokens for your test account.
Access token
Go back to the ‘Instagram Basic Display’ page and scroll back down to ‘User Token Generator’. Here you will now see your test user. Behind this test user is a button to get a token. Click this button and save your token. This token is approximately 170 characters long.
You can use a token for 60 days before you have to create a new one. In 'my next blog', I will explain how you can automatically refresh this token by means of a script.
Fetch your feed
Your last task is to fetch your feed. You can easily do this with an request to the following URL: https://graph.instagram.com/me/media?access_token={YOUR_ACCESS_TOKEN}&fields=media_url,media_type,caption,permalink
This link returns your feed with the following properties per media item:
- media_url: The link you can use as
hrefin your<img> - media_type: Show whether it is a photo or a video
- caption: The description of your media
- permalink: The link to your media
You are now able to place your Instagram photos on your site, for example by using JavaScript. In the next chapter, I will explain how you can do this with VueJS.
Instagram Feed in Vue.js
To keep the website structured, I chose to create a Vue Component. I will explain exactly how Vue components work and how you can make the best use of them in another blog.
For now, it is important to place this file as InstaFeed.vue in your component folder.
After adding this component you can use it in your views as follows:
<insta-feed
 token="{YOUR_ACCESS_TOKEN}"
 fields="media_url,media_type,caption,permalink"
 container-class="image-container"
 :mediatypes="['IMAGE']"
 >
  <template v-slot:loading="props">
    <h1 v-if="props.loading" class="fancy-loading">
      Loading, please wait...
    </h1>
  </template>

  <template v-slot:feeds="props">
    <a :href="props.feed.permalink" rel="noopener" target="_blank">
      <div class="instagram-image">
        <img :src="props.feed.media_url" alt="Instagram post">
        <div :text="props.feed.caption" />
      </div>
    </a>
  </template>

  <template v-slot:error="props">
    <div class="fancy-alert">
      {{ props.error }}
    </div>
  </template>
</insta-feed>
Conclusion
Since June 2020 it has been a bit more difficult to place your Instagram feed on your website, but nevertheless not impossible! Who knows, you might attract new potential customers through your Instagram profile.
If the setup doesn’t work, feel free to send me an email or leave a comment in the comment section.